|
|
|
January
2003 - Issue 20
|
|
Welcome to a new year of byhand! And welcome to the many new subscribers! We're happy to have you here. I hope your holiday season went well!
I
am really excited and pleased to present to you our Yahoo discussion group.
Please consider joining us. There are already 40 chatty artists talking
about all sorts of things. If you already belong to Yahoo groups, you
will have no problem joining.
You may fill out the form above or go to the home page of byhandartists and join there: http://groups.yahoo.com/group/byhandartists/ What started all this was an email from Melody. She asked if there was a place on my website to ask questions and here was her question: Is there any type of glue that you can use to attach Mylar WITHOUT the adhesive showing through? We have discussed this in the byhandartists group and have compared notes. Join us to see what's going on or wait till next month when you can see some examples from the Mylar Challenge...
We have some fine new examples of artwork in the Stamping Gallery. Check them out! and don't forget if you're proud of artwork that you have stamped with a Quietfire Rubber Stamp, please send me a copy and I'll be delighted to put in the Stamping Gallery.
Now Available! More eyelets in Copper and Silver colour, in both long and short neck, "Anywhere" 1/8"punches and more. The long neck eyelets will go through regular weight bookboard. Scroll down to the bottom of the page!
We have 25 participants working feverishly on their Tag Book Swap offerings! If you want to read more about this challenge, click here! I hope to be able to show you a couple next month, even though they are not due until mid-February...
I hope you enjoy this issue of byhand! Studio Tips If you include the off-white dominoes in your artwork, have you tried boiling them in tea to tint them? Lizard tells me that if you use blackcurrent tea, your dominoes will take on a purple hue! and suggests trying any variety of teas to colour them - perhaps even wine. (Didn't Martha Stewart have an article once about dying tags with tea and showed all the different colours? - you can get some amazing shades) Thanks Lizard! I'd be delighted to receive your favourite tips for inclusion here - we can all learn from them and probably save someone - like me - frustrations! Site Siting This month I'd like to point
you in the direction of stamping artist Lenna Andrews Foster. This lady
will stamp on anything, including her backyard swing! Lenna's stamp line
is full of wonderful sayings. Her stamps,artwork and articles can be seen
in numerous publications and best of all, she's a subscriber to byhand!
If you go to her website at http://www.lennastamp.com/
|
Important links at your fingertips! Back Issues of byhand How to subscribe and other stuff! If you wish to contact me, my email address is: suzanne@quietfiredesign.com To subscribe: send me an email
saying 'subscribe'!
Please feel free to browse through my
website
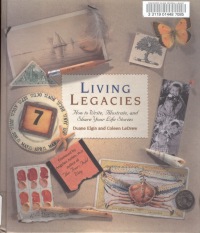
Living Legacies - How to Write, Illustrate,
and Share Your Life Stories
This was another library find! It is a combination of memoir writing and scrapbooking (or visual journaling , if you prefer!) I've really enjoyed reading this book as it helps you focus on the stories you might like to share. The authors suggest that you write short, simple stories accompanied by visual images. The book is divided into easily readable sections including; How to Begin, Creating Your Time Line, and sections on Discovering, Collecting and Writing Your Life Stories. I particularly liked the time line approach ( I used a version of it in my Christmas Card letter!) where they suggest you tape sheets of paper together and draw a line along the middle of the page. On the left mark your birthdate, indicate 10 year periods across the line, then begin to fill in the significant points in your life. Some of these would be births and deaths, moves to new homes, marriage and divorce, beginnings of important relationships and so it goes. What a painless way to chart a life whether it be your own or a loved one. I may have to purchase this one.... I'll just add it to my Amazon.ca wish list... (did you know you could make a wish list online and refer to it whenever you feel the need to spend $ on books? Love it!)
|
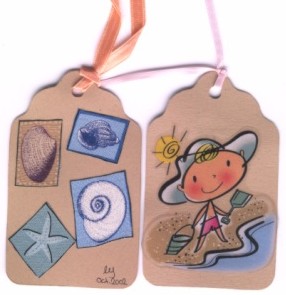
Seasons Tag SwapWe had 22 players in this swap! And
you really have to see the tags in person to appreciate them. |
|
|
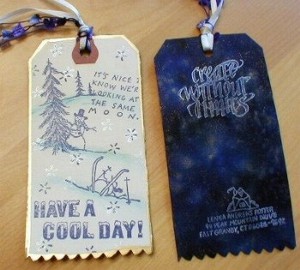
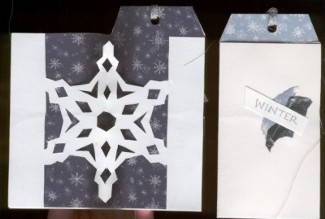
Lenna Andrews Foster I got Winter - which was fun! I used Stampourri Stamps except for "It's nice to know we're looking at the same moon" ~ That's a lovely Claudia Rose stamp :O) The 'Have A CooL day' - I do not know who makes it as it is an old stamp! I glued some paper done by Peggy Skycraft on to the back of my tags and stamped one of Suzanne's own Rubber Stamp designs, 'Create Without Limits' in silver Brilliance Ink right on this paper . |
|
|
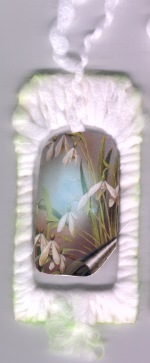
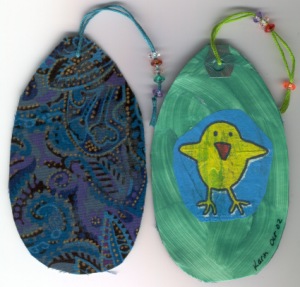
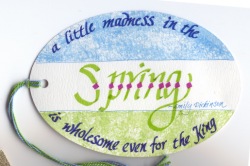
Lorna Long For the wool covered tag I used two sided tape to keep the wool from slipping. The concept was to visualize snowdrops popping out of the snow. I don't have any snowdrops in my garden yet. Maybe this year though I am not sure they will survive in our cold snowy climate. I usually end up in Victoria about the time they are blooming and my sister has hundreds of them. My favorite sign of spring!!! |
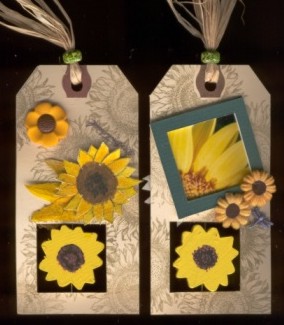
Marilyn Smitshoek Marilyn wrote that she immediately thought of sunflowers when she was assigned summer. She wanted to do a window and "in one of those moments of inspiration that occur when you're lying awake at 3:00 in the morning - I decided to suspend the wooden sunflowers inside a window. I used straight pins and snipped off the tips, and the rest as they say is history. The sunflower petals are courtesty of my dad's partner, Anna-Mae. I knew they had grown some sunflowers in their garden this summer and I knew that Anna-Mae had a flower press and since they were coming out here for Thanksgiving, I figured that would be perfect. So a big thank you to Anna-Mae for helping with the project. I'm looking forward to seeing what everyone else has done. Thery're always a big inspiration for me." |
|
Gail Ellspermann Gail made very large tags of leather. The details she has put into her tags are revealed anew everytime I look at them. Gail's work can be seen in the Melange section of the current Somerset Studio! |
|
|
Pat Williams |
|
|
Karin Trgovac
|
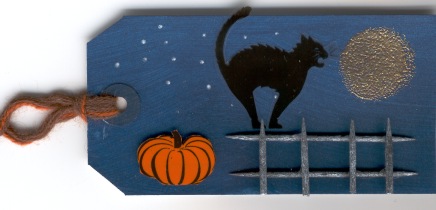
Elaine Yee |
|
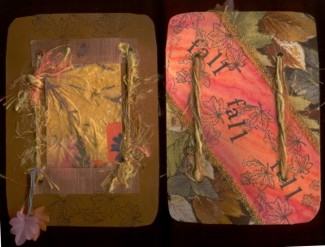
Fall to me is HALLOWEEN ! My hubby and I love to carve pumpkins every year and it has become a tradition. There are 4 seasons in my world, Spring, Summer, Halloween and Christmas!!! For this tag I used the blue acrylics (again) and dotted with an iridescent white for the stars. The moon is a mix of gold and copper and clear and what-have-you embossing powder. With the pumpkin I photocopied the pumpkin design onto clear acetate and used acrylic to color the backside and then cut it out and applied it with some foam tape. I did the same for the cat except he/she was already black, so no coloring just lots of cutting (don't look too close). The fence was my problem area, as I had wanted to do it in polymer clay and have the cat be able slide along it. But time was short so I had to improvise. Toothpicks were the answer. I cut them and painted with a base of acrylic black - WHAT A MESS! - Why didn't I just roll them in a black stamp pad! UGH! Anyway, I wanted the fence to look like a white fence at night would like. So I dry brushed white acrylic onto it to give it that moon-shinning-on-it look. All the acrylics except the pumpkin had an iridescent medium mixed into the paint for added sparkle. I think I am part crow as I LOVE shinies. I hope you enjoy my tag as much as I enjoy receiving yours. |
|
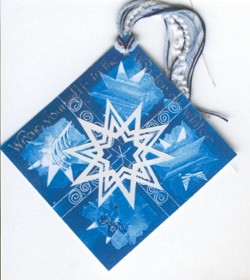
Shirley Van Eaton - Tag design grew out of a paper pattern created for a theme I was developing for the London City & Guilds Embroidery and Design course in which I am involved. Hand cut star came from the same theme. (paste-paper, collage and penwork)
|
|
|
Nancy Quinn - Hand-carved pumpkin, Hand-cut AUTUMN stencil, Leaves punched from photograph, Stampin"UP! Little shapes background. |
Peggy Poellot |
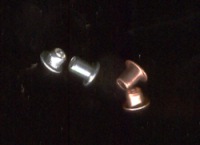
My Passion for Copper - Part IVParts I through III can be found in the previous issues of byhand Heating Copper
|
|
Gentle Thoughts
|
|
Suzanne's Schedule
|
|||||||||||||||||||||||||||||||||||||||||
brace
yourselves...
|
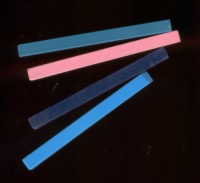
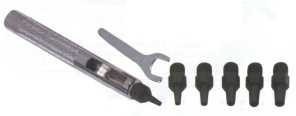
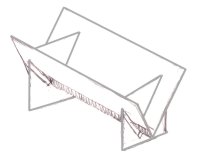
Non-Traditional Tools for Calligraphy
|
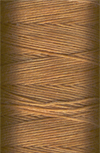
Waxed Linen Thread
Prices: It is ($0.35/yard
U.S. funds).
|
|||||||||
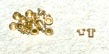
The eyelets!
These
are weeny cute little guys. They
are 1/8" eyelets. There are regular and long neck eyelets. The
long neck eyelets will go through a regular thickness of bookboard. (the long and short Copper are real copper and the long neck brass are real brass)
|
|||||||||
|
|
|||||||||
|
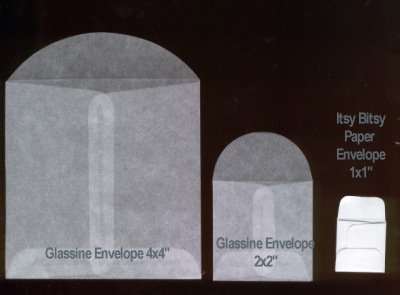
The Envelopes
|
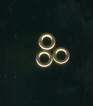
Subtle, but they make a statement! These are washers for your 1/8" eyelets. What will they think of next??? 100/package
|
||||||||
|
They fit nicely on a bookboard of about 2.2mm thickness covered with decorative paper. |
|||||||||
|
If there is any information you would like to see in this newsletter,
let me know. Each month I will email you to let you know the new issue
is published. If you know someone who would like to receive notice of
byhand, just have them email me and I
will put them on the list. Bye for now and thanks for visiting! suzanne@quietfiredesign.com |
|
|
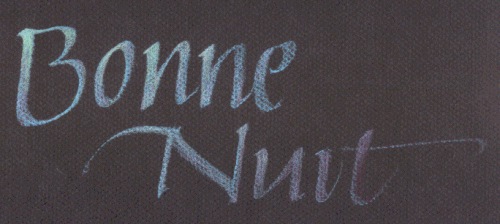
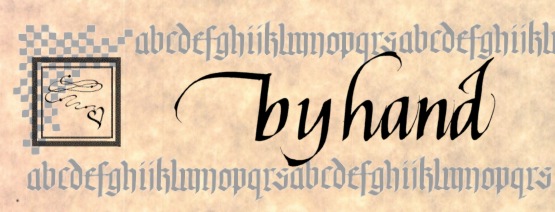
The original title lettering of byhand was done with a Mitchell's Roundhand Nib, size 0, and Higgins Eternal Ink. Quietfire Design Rubber stamps were used to create the other designs. |


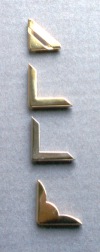
 Susan
Ewart -
Susan
Ewart -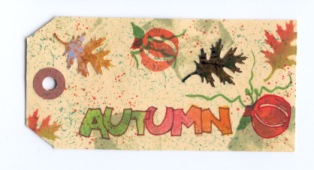
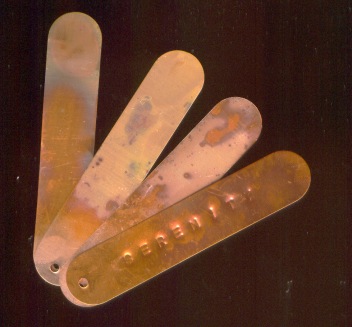 What
could be simpler? I took one of the copper plant tags from Lee Valley
and, using tongs, I held the tag over a lighted candle. After a short
time, the tag began to take on the most amazing colours. This scan just
doesn't do them justice! You can also do this on the stove top. If you
heat them for too long all the colour seems to disappear, so trial and
error will tell you when to stop. The bottom tag has been stamped with
metal letter stamps. These come in a variety of sizes and are available
What
could be simpler? I took one of the copper plant tags from Lee Valley
and, using tongs, I held the tag over a lighted candle. After a short
time, the tag began to take on the most amazing colours. This scan just
doesn't do them justice! You can also do this on the stove top. If you
heat them for too long all the colour seems to disappear, so trial and
error will tell you when to stop. The bottom tag has been stamped with
metal letter stamps. These come in a variety of sizes and are available

 The
modern calligraphic revival started with William Morris and the Arts and
Crafts movement of the 19th century. He studied and incorporated historical
letterforms into his limited edition books. Later
Edward Johnston did more comprehensive study and taught many scribes who
expanded the craft to many more.
The
modern calligraphic revival started with William Morris and the Arts and
Crafts movement of the 19th century. He studied and incorporated historical
letterforms into his limited edition books. Later
Edward Johnston did more comprehensive study and taught many scribes who
expanded the craft to many more. The
lettering tools of the calligrapher are more widely varied than ever before
but include the traditional reed pens and quills, as well as metal nibs,
pens of all sizes and shapes, pointed and flat brushes, and a newcomer,
the ruling pen. Tongue depressors, carrots and musical reeds have not
escaped our whims.
The
lettering tools of the calligrapher are more widely varied than ever before
but include the traditional reed pens and quills, as well as metal nibs,
pens of all sizes and shapes, pointed and flat brushes, and a newcomer,
the ruling pen. Tongue depressors, carrots and musical reeds have not
escaped our whims.