|
|
|
February
2003 - Issue 21
|
|
Happy February! First of all - Welcome to all the new subscribers! There are about 30 of you this month. Hope you enjoy byhand! Sorry this newsletter is a bit late but I've been on a whirlwind tour of Alberta in recent weeks, teaching 5 different groups and 4 different classes over 7 days of teaching. Whew! Air Canada must just roll their eyes when they see me coming. Between shipping supplies ahead and the suitcases I took with me I had 150 lbs of stuff (really good stuff, mind you!). I came home considerably lighter, even though I went shopping! Thanks to all of those who came to my classes, and especially those wonderful people who picked me up and dropped me off at airports and bus terminals (sometimes in less than perfect weather) and the generous souls in the three homes where I was hosted and fed. I had a wonderful time! Please check out the Class Photos Page where you'll get to see some of the things we did in class and who we did it with! There will me more photos to add to these as I get them!
Don't forget if you're proud of artwork that you have stamped with a Quietfire Rubber Stamp, please send me a copy and I'll be delighted to put in the Stamping Gallery.
The books for the Tag Book Swap are coming in. I'm not peaking - yet! If you want to read more about this challenge, click here! I will start showing them to you next month....
If you are ordering some of the items listed below, including rubber stamps, you might find it convenient to use the byhand Products Order Form . I may have a shopping cart in the near future for your convenience.
I'd really like to extend a special thanks to those wonderful sharing artists in the byhandartists group for really making this a wonderful issue of byhand! I hope you enjoy this issue of byhand!
Books to Inspire Back next month!
|
Important links at your fingertips! Back Issues of byhand
How to subscribe to the byhand newsletter and other stuff! If you wish to contact me, my email address is: suzanne@quietfiredesign.com To subscribe:
send me an email saying 'subscribe'!
Please feel free to browse through my
website
Come join us in our Yahoo discussion group, where we talk about artistic inspirations, make inquiries about techniques, and share quotes and resources.
http://groups.yahoo.com/group/byhandartists/ Site Sitings
and
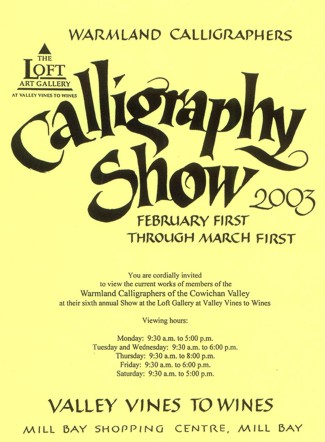
On the Island between Duncan & Victoria: The Warmland Calligraphers, located in the Cowichan Valley, are having an exhibition of their artwork. Check it out!
|
|
I am happy to tell you about this
years Artwerx, which promises to be even bigger and better than the last
one! This year the event will take place in August, so it'd make a perfect
summer holiday. For American friends Artwerx is particularly attractive
due to the wonderful Canadian/US dollar exchange rate. If you'd like to
read my review of last years event, click
here, and scroll about 1/4 down the page. Quietfire Design (that'll
be me) plans to have a vendor table, so drop by and say Hi!
August 15, 16 and 17th, 2003 ARTwerx is... an event designed to bring unique and inspiring instructors together with like minded artistic individuals, in an atmosphere of creativity and exploration. ARTwerx is 3-day weekend workshop event, and is geared toward beginner as well as advanced artists, who are looking to expand their artistic repertoire of techniques and experience. Each of the workshops over the 3-day weekend are FULL-DAY classes starting at 9:00am, finishing about 5:00pm. The full-day format allows for individuals to really immerse themselves in the wonderful new techniques you will learn from our artist/instructors; it gives you the opportunity to complete a larger project; push your creative boundaries; and form new friendships in a nurturing and creative atmosphere. Here are the internationally renown list of instructors at this years Artwerx: Pamela Allen, Doris Arndt, Nina Bagley, Dayle Doroshow, Claudine Hellmuth, Karen Michel, Sharilyn Miller, Lesley Riley, Helga Strauss, Kathy Van Kleeck, Brionie Williams Hope to see you there!
|
|
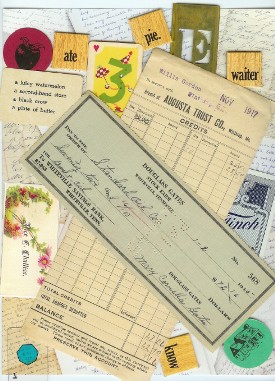
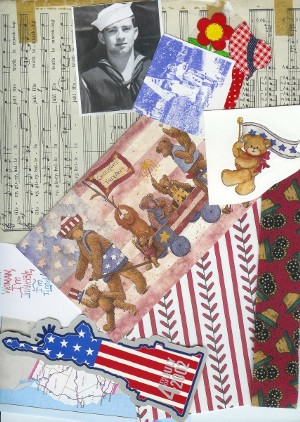
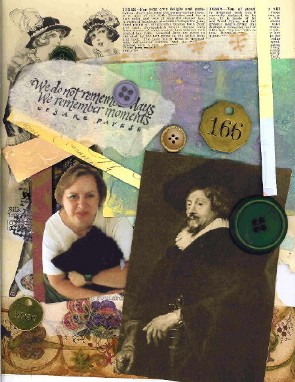
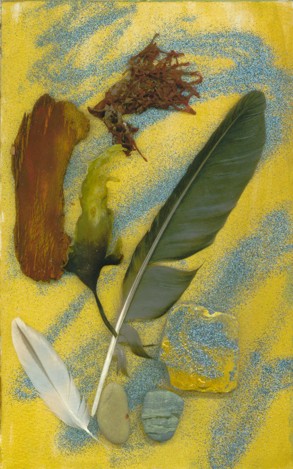
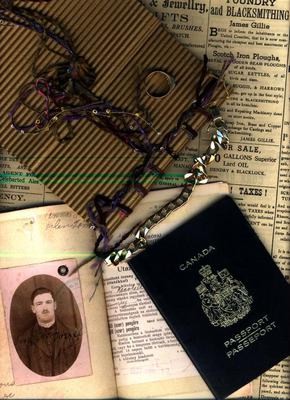
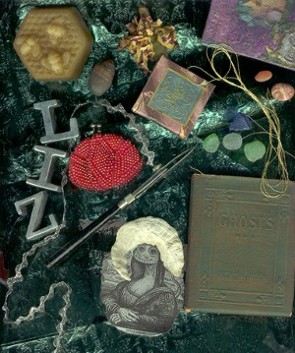
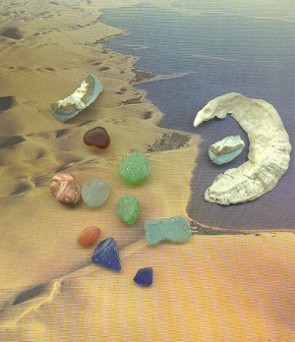
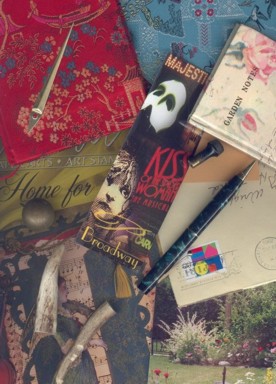
Studio Tips Glueless
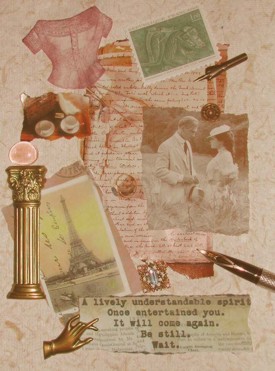
Collage Recently, on one of the online groups I belong to, an artist wrote that when she wanted a quick collage, she would lay the items down on her scanner bed in a pleasing arrangement and scan them. No glue! This just tickled me pink! So I mentioned this to the byhandartists group and here are some that we came up with! Once the group got started, they got hooked! Check these out - they're amazing.
I'd be delighted to receive your favourite tips for inclusion here - we can all learn from them and probably save someone - like me - frustrations! |
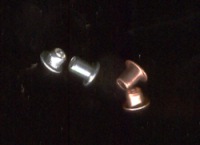
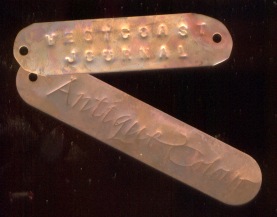
More Passion for Copper - Part VParts I through IV can be found in the previous issues of byhand The Bleach/Vinegar Bath
If you want your copper to look antiqued, drop it into a bath of 50% bleach and 50% vinegar (I used regular white vinegar). It only takes a few minutes. I used gloves and tongs or tweezers when handling the solution and the wet copper. When you remove the copper from the bath, rinse it thoroughly under the tap. For the lower one, I just brushed the solution on with a Q-Tip. |
|
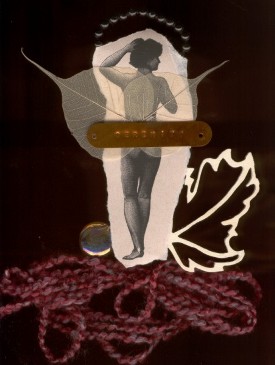
Gentle Thoughts
In In January I took a class from
calligrapher Sandy Sommerfeld. |
The Mylar ChallengeLast month I mentioned to you that I'd had an email regarding the gluing of mylar to a surface. Melody had looked on my website for a place to ask questions and little did she know this would start a whole group effort! We have discussed this in the byhandartists group and have compared notes. We opened a whole can of worms, and learned things we didn't know and discovered some cool new ways of using mylar (and/or acetate). My thanks to Charmaine, Lizard, Patti, Zoe, Anne and other byhandartists for their generous thoughts and contributions. When I proposed the Mylar challenge to the group, I was thinking of a clear film. I soon learned (thanks to Lizards research) that Mylar is "A trademark used for a thin strong polyester film Mylar® is an extraordinarily strong polyester film that grew out of the development of Dacron® in the early 1950s. During the 1960s cellophane gave way steadily to Mylar® with its superior strength, heat resistance, and excellent insulating properties. The unique qualities of Mylar® made new consumer markets in magnetic audio and video tape, capacitor dielectrics, packaging and batteries possible." Patti enlightened me that Mylar comes frosted, as well as clear and you can see some of her work below where she used it. Gail mentioned that she knew about those silver Mylar balloons! I hadn't even thought about the balloon thing! I went into Island Blue Print which is an arts/graphics supplier and said to the clerk: "If I was to ask for Mylar, what would you show me?". I was shown three items, one was Mylar Film which was clear, one was drafting Mylar which was similar, but frosted, and the other was "vellum", also frosted but tearable. When I asked what overhead transparencies were made from, she said either acetate or Mylar. Inquiring minds want to know about this glue problem, so I did a bunch of tests with clear overhead transparencies and frosted paper. Here are those test results:
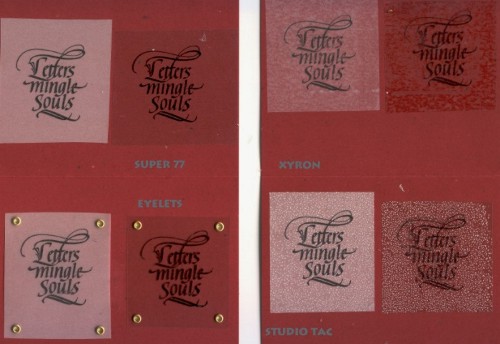
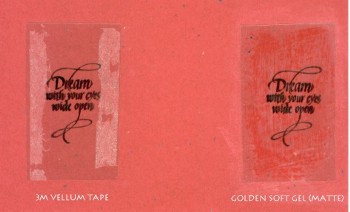
I used a rubber stamp on pieces of an overhead transparency and on some vellum that I had. I glued the pieces down using Super 77 spray glue, Studio Tac Adhesive, pounded in some eyelets and I ran the two pieces through my Xyron. The Super 77 did a far better job than the other adhesives. Out of curiosity, I stamped two more pieces of transparency with rubber and mounted them using the new 3M Vellum tape and then tried brushing on Golden soft gel medium. The vellum tape works like a dream on vellum, but ahem, not here....
|
|
|
Below are samples of artwork done by the byhandartists who are happy to share their creations. The way in which they use this mylar/acetate stuff is as varied as the artists themselves. We hope this answers Melody's question! Any more challenges for the byhandartists? We're at your service! And please feel free to join us! Enjoy! |
|
|
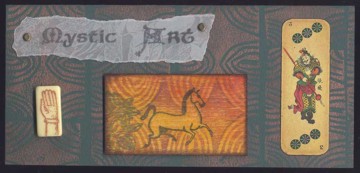
Patti Sandham Ok I am cheating a bit as this is a card I did before the challenge was announced. I used eyelets to fasten the mylar. I stamped the words Mystic Art on the mylar and tore the edges. It has a frosted leaf design on it. I carved the background stamp. |
|
|
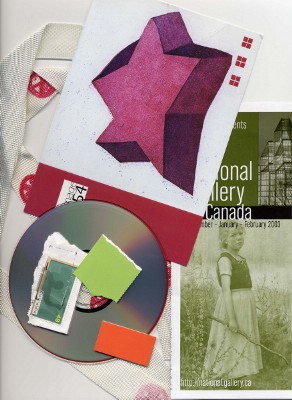
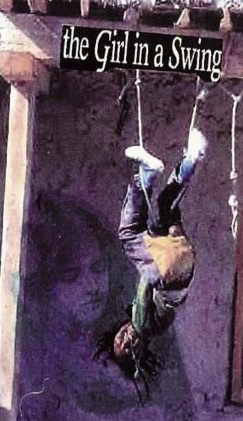
Zoe I am quite lazy, but try to use products to their best advantage. In the "Swinging" collage, I inkjet copied the image onto acetate transfer, then transfered the image by lazer copying (precisely adjusted) to my other collage elements. |
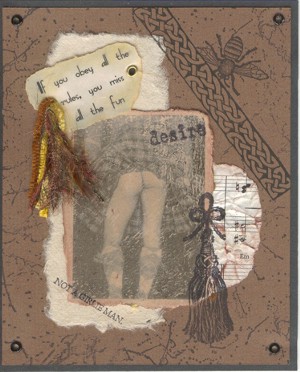
Lizard Don't know if this qualifies for the Mylar challenge but I printed on mylar and then used acrylic medium to transfer it to paper. I made this card for a post wedding shower for my boss. |
|
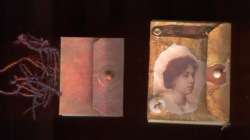
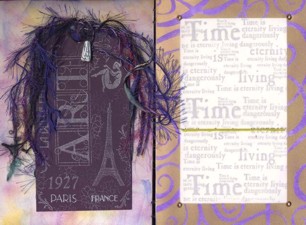
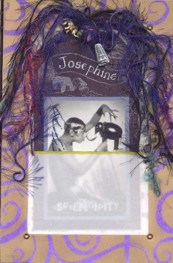
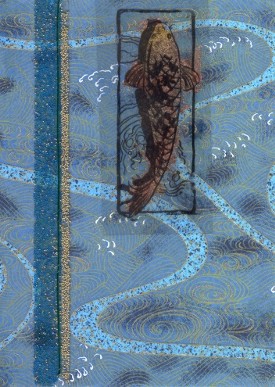
Patti Sandham I made a mylar pocket in my journal. It was preprinted with the gold border which is where I glued it so you couldn't see it. Then I also added the rivets for extra strength. I stamped a quote underneath so when the tag was pulled out then you can see it. :) |
Here is the mylar pocket with the tag in it. I like seeing through it. :) |
|
Anne Atkinson I used acetate, double-sided tape and gold leafing with Japanese Paper. |
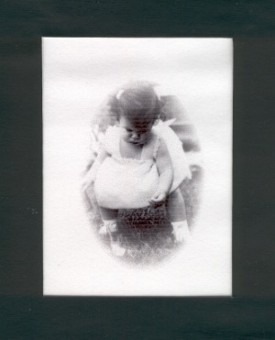
Suzanne Cannon I printed this transparency with my inkjet printer, then painted the journal page with black gesso. I cut a window through 2 pages of my journal and sandwiched the transparency in between, then glued the two pages together. You can see the transparency didn't print all that well... |
|
Suzanne's
Schedule
|
|||||||||||||||||||||||||||||||||
|
Just a little note about these items I have for sale.I really don't want to charge you a whole lot for shipping. That's the beauty of no shopping cart (which automatically calculates your shipping). There's nothing worse than making purchases that you know will fit in a little envelope and paying $10 plus for shipping! So, if you decide to combine the items below, and it doesn't add up to very much weight, you don't have to pay a lot of extra shipping. Please feel free to email me for more information! I'm delighted to help you create beautiful things. Shipping for most items will be $2 within Canada and
US$2 to the United States. You may wish to email me to check for availability! Email me your list and avoid disappointment! Please
make your cheques payable in Canadian or U$ funds to Suzanne
Cannon and mail to |
Waxed Linen Thread
Prices: It is $0.50/yard
Cdn ($0.35/yard U.S. funds). For those of you who have taken the Coptic Stitched Class, it takes two yards of thread to complete the book as we made it. For those of you who have taken the Criss Cross Coptic, you will require five yards per book. |
|||||||||||||||||||||
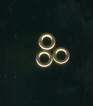
The eyelets! |
|||||||||||||||||||||
| Brass coloured regular | $5.00 Cnd | $3.50 USD |
| Brass Long neck | $5.00 Cnd | $3.50 USD |
| Silver regular | $5.00 Cnd | $3.50 USD |
|
Silver Long neck |
$5.00 Cnd | $3.50 USD |
| Copper regular | $5.00 Cnd | $3.50 USD |
| Copper Long neck | $5.00 Cnd | $3.50 USD |
(the long and short Copper are real copper and the long neck brass are real brass)
![]() This
is just the best little eyelet setter! It's hard to mess up, in
fact, since I began using this setter, I haven't messed up!
This
is just the best little eyelet setter! It's hard to mess up, in
fact, since I began using this setter, I haven't messed up!
$8.50 each
$5.50 USD each
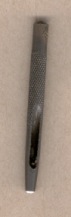 This is
the Anywhere Punch - it allows you to make 1/8" holes for
the eyelets *anywhere*! - not just close to the edge of the paper.
This is
the Anywhere Punch - it allows you to make 1/8" holes for
the eyelets *anywhere*! - not just close to the edge of the paper.
$6.00 each
$4.00 USD each
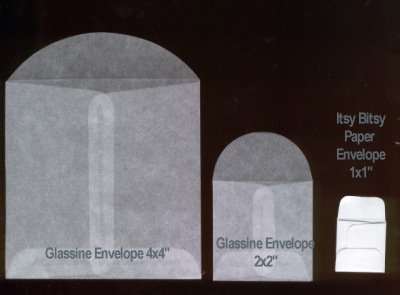
The Envelopes
These cool fellas are perfect for altered books, journals and cards!
| Glassine Envelopes 4x4" 10/pkg. | $2.50 Cnd | $2.00 USD |
| Glassine Envelopes 2x2" 10/pkg | $2.00 Cnd | $1.50 USD |
| Itsy Bitsy Paper Envelope 1x1" 15/pk | $5.00 Cnd | $3.50 USD |
Subtle, but they make a statement!
These are washers for your 1/8" eyelets. What will they think of next???
100/package
specify:
brass
silver
copper
$5.00 each
$3.50 USD each
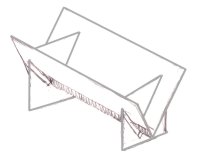
I have put together some
Book Cradles for sale as some of you have been asking for them.
They are not things of great beauty, but really, really handy for when
you have a lot of holes to pierce. The legs come off so they're perfect
for going to classes. They are large enough for an 8.5" spine length and
are $18Cdn (or $12US - to the States).
I will try to bring these to classes so you can
see them in person!
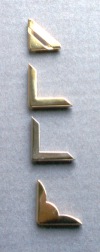 Book
Corners
Book
Corners
Jazz up your book covers with metal corners!
I use them on the foredges of books, by applying a little glue
and then crimping them, ever so lightly with a pair of pliers.They are
all brass except the 3rd one down is Nickel or silver coloured.
| Brass slotted | $0.50 Cnd each | $0.35 USD each |
| Brass regular | $0.50 Cnd each | $0.35 USD each |
| Nickel regular | $0.50 Cnd each | $0.35 USD each |
| Brass scalloped | $0.50 Cnd each | $0.35 USD each |
They fit nicely on a bookboard of about 2.2mm thickness covered with decorative paper.
To order any of the above items and the rubber stamps
go to:
Printable byhand
Products Order Form.
|
If there is any information you would like to see in this newsletter,
let me know. Each month I will email you to let you know the new issue
is published. If you know someone who would like to receive notice of
byhand, just have them email me and I
will put them on the list. Bye for now and thanks for visiting! suzanne@quietfiredesign.com |
|
|
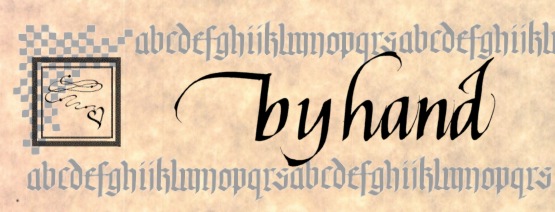
The original title lettering of byhand was done with a Mitchell's Roundhand Nib, size 0, and Higgins Eternal Ink. Quietfire Design Rubber stamps were used to create the other designs. |


 Now,
this treatment, while it's effective, is really smelly! My family has
banished me to the garage when I'm doing this! (So make sure you do
it outside!)
Now,
this treatment, while it's effective, is really smelly! My family has
banished me to the garage when I'm doing this! (So make sure you do
it outside!) 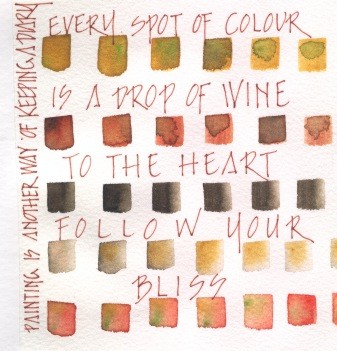
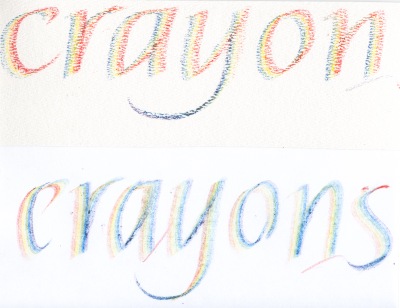
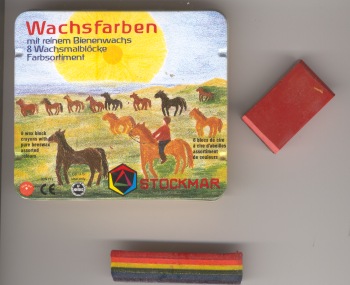 A
few years ago these little crayons saved my calligraphic life! I had gone
off to teach a calligraphy class at a brand new school, got there and
looked at the boards. Not a black board in sight! It was the new elementary
school for the hearing impaired in Burnaby and they have a lot of tv monitors
which required a chalk-free environment.
A
few years ago these little crayons saved my calligraphic life! I had gone
off to teach a calligraphy class at a brand new school, got there and
looked at the boards. Not a black board in sight! It was the new elementary
school for the hearing impaired in Burnaby and they have a lot of tv monitors
which required a chalk-free environment.