|
|
|
brought to you in living colour by Quietfire Design April 2003 - Issue 23 |
|
Welcome to the April 2003 issue of byhand! We have a lot of new subscribers this month! Welcome and I hope you enjoy this issue.
Congratulations Bonnie! And what does Bonnie win? She chose: a grab bag of Quietfire Rubber Stamps!
Back in Stock!! Rubbah! I'm delighted that the following items are back in stock:
The
byhand
Products page The shopping cart is a PayPal shopping cart, but if you do not wish to use PayPal, the shopping cart list can be copied (highlight and copy) and pasted into an email to me.
Don't forget if you're proud of
artwork that you have stamped with a Quietfire Rubber Stamp, please send
me a copy and I'll be delighted to put in the Stamping
Gallery.
I have updated the links page with quite a few of the links I have included in past issues of byhand. Check them out again!
April Journal ChallengeFor those of you who want to
keep a journal and have trouble sticking to it, I have a challenge for
you this month. It's pretty simple...
And for the seasoned journalers: can you distill your day down to just 3 words? The deadline
for receiving
|
Important links at your fingertips!
Back Issues
of byhand
Come join us in our Yahoo discussion group, where we talk about artistic inspirations, make inquiries about techniques, and share quotes and resources.
http://groups.yahoo.com/group/byhandartists/
How to subscribe to the byhand newsletter and other stuff! If you wish to contact me, my email address is: suzanne@quietfiredesign.com To subscribe: send me an email saying
'subscribe'!
Please feel free to browse
through my website
Quietfire
Design is proud to be a Sponsor at this years Artwerx. We will
also be at the Vendor Market will a whole pile of goodies for
your creative whims!
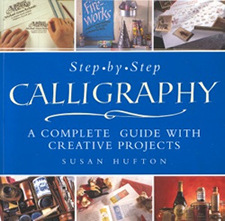
Many students ask me to recommend a
calligraphy book to them. I think they are looking for one book that
tells them everything. Unfortunately, there is no such critter! The
above book, Step-by-Step Calligraphy by Susan Hufton, is a good book.
Her letter forms are excellent (which is not true of every calligraphy
book out there....). And I like this book because you can purchase it
at Michael's, which means it's readily accessible. Susan Hufton shares a website with two other prominent British calligraphers, Patricia Gidney and Gerald Fleuss (who I had the pleasure of chatting with when I lived in England - he is a master of layout and design) I bought this book when the last thing I needed was another how-to book! But I've been absolutely delighted with it every time I open it!
Site SitingThis month I would like to feature
another byhand subscriber Dale
Roberts of Victoria, B.C.
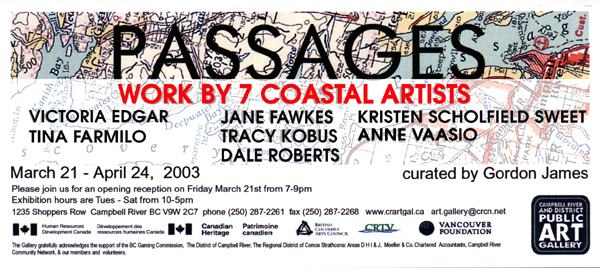
Dale does amazing stuff which I just cannot describe - you MUST go to his website to see more! Make sure you look at his archives. Dale is one of the artists featured in an exhibition in Campbell River this month. See the information about Passages below. |
 |
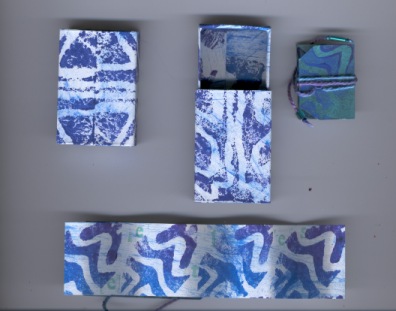
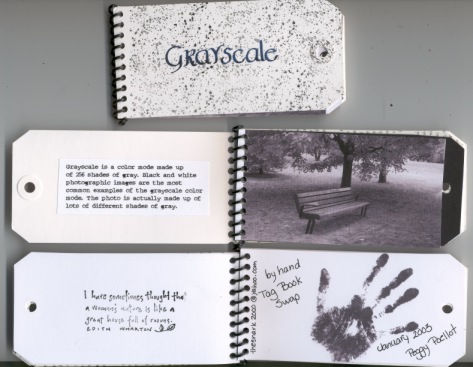
Tag Book SwapIn December I proposed the Tag Book Swap, where artists were to design small books using shipping tags as some part of their books. If you want to read more about this challenge, click here! There were 25 artists involved and the first few books were shown last month. They will continue to be shown over the next couple of months. Stay tuned for some great, inspiring creations! Here is this months collection with comments from the artists. |
|||
|
Donna Clement Based on a study of beetles for my City and Guilds Design class. Made over 25 different stamps (4 used here) to get across the "essence" of bug. |
|||
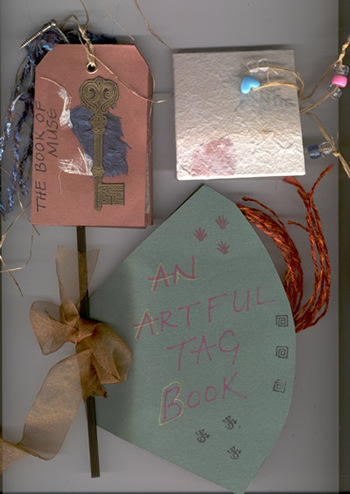
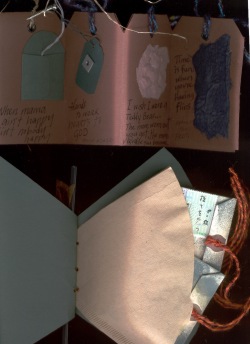
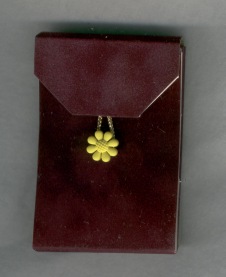
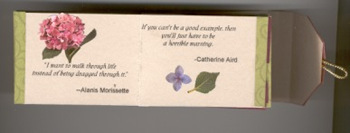
Anne Atkinson (ed. comments:) Here are the outsides of some of the books that Anne created. She got bored doing the same thing so redesigned a number of times. These books are absolutely full of quotations, collages and fibres. The coffee filter book has tag books in each of its pockets!
|
|||
|
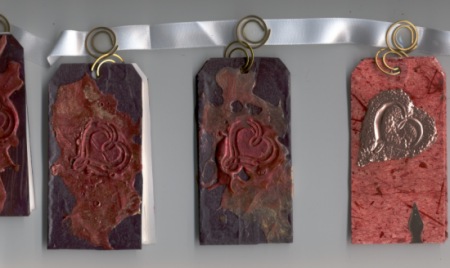
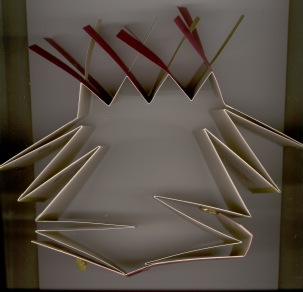
Lorna Long My idea was to use the
Heart Theme but not necessarily restrict it to Valentine. Each page is
intended for H words, E words, etc. When I counted my 15 books, I discover I only had 12, hence the 3 others. They are covered with paper which I got at Island Blue Print years ago. Then made the copper hearts and applied them with - no other than Crystal Lacquer. I used a bit of the lacquer over the whole page to get the finish on a couple of them. The darts are copper book darts from Lee Valley. (In her write-up Lorna said nothing about her Clipiola Garland or her Clipiola bindings! Great idea!) |
|||
|
Petty Pellot |
|||
|
Christiane Lenz Tags were decorated using Speedball printing ink and brayer. Lettering is done in walnut ink on paper called Legion India "Coire" or "Wool" available from Opus. Even though it is considered decorative paper it does not tend to bleed. Threads got from the Beehive Shop at Douglas and Herald in Victoria - it's called Verikeri Muench yarns.
|
|||
|
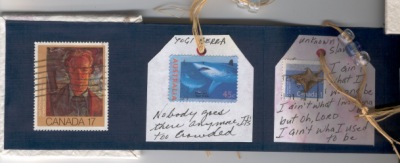
Kim Sickler Used a regular size shipping tag; made a stencil with another tag and used a punch to cut out the places where I wanted to use lavender chalk ink for a patch. Made a signature with 6 pieces of paper folded in half; pamphlet stitched the binding with fibers; Velcro for closure under flap; glued large gem over the brown on top of flap. Stamps are Penny Black for pen nib; Stampers Anonymous- key; Alias Smith & Rowe- tiny envelope template stamp inside front cover; not sure about the post card and the writing. |
|||
|
|
|||
|
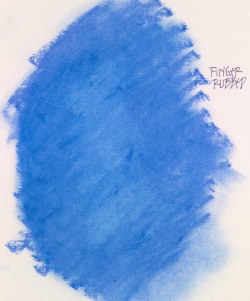
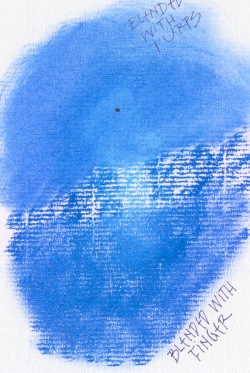
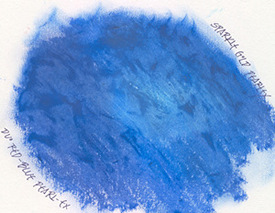
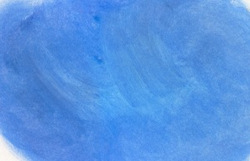
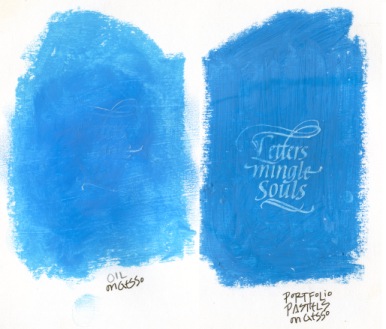
Stolen
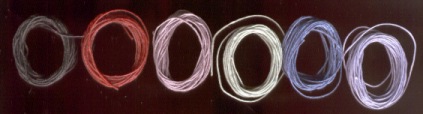
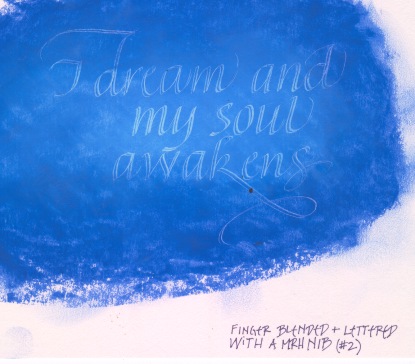
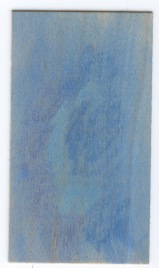
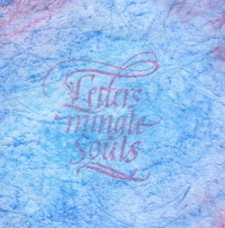
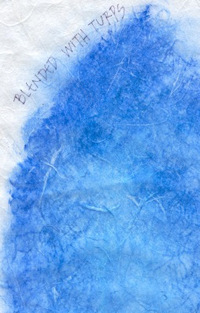
Moments Oil Pastel Rub The focus on this technique was inspired by a project Charmaine Stack was working on (Charmaine was our featured Site Siting artist last month). She was taking simple, inexpensive oil pastels and blending them together to create lovely backgrounds. Never having done much with oil pastels, but knowing I had some stashed away (!), I dragged them out to do some experimenting. I chose three colours, see below, and rubbed them onto a piece of cardstock....
I'd be delighted to receive your favourite tips and techniques for inclusion here - we can all learn from them and probably save someone - like me - frustrations! |
||||||||||||||||||||||||||||
A Passion for Copper - Part VIEmbossing
|
|
Gentle Thoughts
|
|
Suzanne's Schedule
2003
Summer and Fall Schedule
|
|||||||||||||||||||||||||||||||||||||||||||||
Nontraditional Tools for CalligraphyGlue PenWant something quick and easy? I was fooling around with my Zig Glue pen that I'd had hanging around for years. The one pictured here is the updated version of what I have, but it appears to do the same things.
The tip is chisel shaped and allows some semblance of broad-edged lettering. It's quite a fat chisel, about 1/4" wide, so the letters must be quite large and they are not going to be "fine lettering"! Here are a couple of samples I made with the glue pen.... You would probably want to seal the final product with a spray fixative. Kinda fun!
Other items you might want to glue down are glitter, embossing powder and gold leaf. |
*New* note about these items I have for sale.For your convenience,
I have created a the new You may wish to email me to check for availability! Please feel free to email me your list and avoid delays! If
you are using the byhand Products
order form, please make your cheques payable in Canadian or U$ funds
to Suzanne Cannon. Your items will be shipped
when the cheque has been received. It has been known to take 2 weeks for
a cheque to get to me.... Go figure. *Prices subject to change without notice |
Waxed Linen Thread
4-ply Waxed Linen Thread Prices: It is $0.50/yard
Cdn ($0.35/yard U.S. funds). For those of you who have taken the Coptic Stitched Class, it takes two yards of thread to complete the book as we made it. For those of you who have taken the Criss Cross Coptic, you will require five yards per book.
|
|||||||||||||||||||||
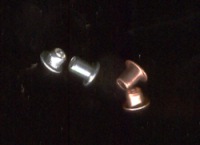
The eyelets! |
|||||||||||||||||||||
| Brass coloured regular | $5.00 Cnd | $3.50 USD |
| Brass Long neck | $5.00 Cnd | $3.50 USD |
| Silver regular | $5.00 Cnd | $3.50 USD |
|
Silver Long neck |
$5.00 Cnd | $3.50 USD |
| Copper regular | $5.00 Cnd | $3.50 USD |
| Copper Long neck | $5.00 Cnd | $3.50 USD |
(the long and short Copper are real copper and the long neck brass are real brass)
![]() This
is just the best little eyelet setter! It's hard to mess up, in
fact, since I began using this setter, I haven't messed up!
This
is just the best little eyelet setter! It's hard to mess up, in
fact, since I began using this setter, I haven't messed up!
$8.50 each
$5.50 USD each
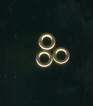
Subtle, but they make a statement!
These are washers for your 1/8" eyelets. What will they think of next???100/package
specify:
brass
silver
copper
$5.00 each
$3.50 USD each
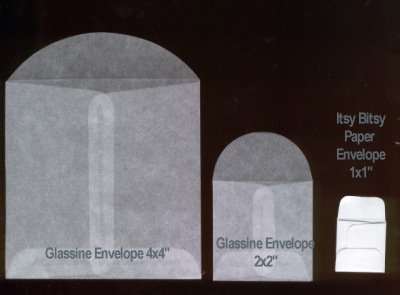
The Envelopes
These cool fellas are perfect for altered books, journals and cards!
| Glassine Envelopes 4x4" 10/pkg. | $2.50 Cnd | $2.00 USD |
| Glassine Envelopes 2x2" 10/pkg | $2.00 Cnd | $1.50 USD |
| Itsy Bitsy Paper Envelope 1x1" 15/pk | $5.00 Cnd | $3.50 USD |
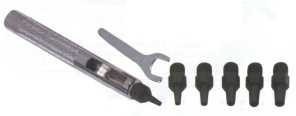 Anywhere
punch with 6 bits This wonderful punch has 6 different bits allowing
you to punch holes in the following sizes: 5/64, 3/32, 1/8, 9/64, 5/32
and 11/64 (or 2, 2.5, 3, 3.5, 4 and 5 mm) $14.00 Cnd ($9.50 US dollars)
Anywhere
punch with 6 bits This wonderful punch has 6 different bits allowing
you to punch holes in the following sizes: 5/64, 3/32, 1/8, 9/64, 5/32
and 11/64 (or 2, 2.5, 3, 3.5, 4 and 5 mm) $14.00 Cnd ($9.50 US dollars)
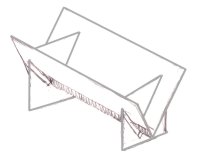
I have put together some
Book Cradles for sale as some of you have been asking for them.
They are not things of great beauty, but really, really handy for when
you have a lot of holes to pierce. The legs come off so they're perfect
for going to classes. They are large enough for an 8.5" spine length and
are $18Cdn (or $12US - to the States).
I will try to bring these to classes so you can
see them in person!
There is an additional $2.00 shipping charge for this item
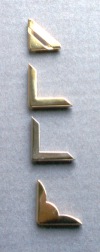 Book
Corners
Book
Corners
Jazz up your book covers with metal corners!
I use them on the foredges of books, by applying a little glue
and then crimping them, ever so lightly with a pair of pliers.They are
all brass except the 3rd one down is Nickel or silver coloured.
| Brass slotted | $0.50 Cnd each | $0.35 USD each |
| Brass regular | $0.50 Cnd each | $0.35 USD each |
| Nickel regular | $0.50 Cnd each | $0.35 USD each |
| Brass scalloped | $0.50 Cnd each | $0.35 USD each |
They fit nicely on a bookboard of about 2.2mm thickness covered with decorative paper.
|
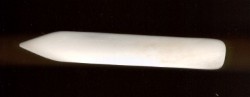
Bone Folders $10.00 Cnd $6.00 USD |
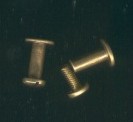
Chicago Screws, brass, post and screw, $0.75 pair Cnd $0.50 USD |
New!
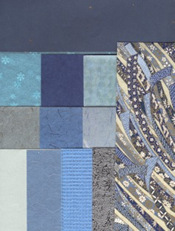 Collage
Packs - 40 different collage
paper treasures - colour-coordinated Japanese papers. There is
one colour scheme on the front and a different one on the back. For invitations,
name tags, collage, card-making, bookmarks, drawing, painting, poetry,
rubber-stamping, photo mats, calligraphy, place cards, book covers, gift
wrapping. . . Assorted
colours, package size 8 1/2 x 11
Collage
Packs - 40 different collage
paper treasures - colour-coordinated Japanese papers. There is
one colour scheme on the front and a different one on the back. For invitations,
name tags, collage, card-making, bookmarks, drawing, painting, poetry,
rubber-stamping, photo mats, calligraphy, place cards, book covers, gift
wrapping. . . Assorted
colours, package size 8 1/2 x 11
$9.50 US dollars per pack
$14.00 Cdn per pack
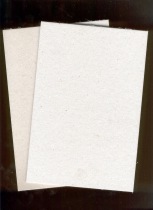 Book
Boards - precut 9" x 6", perfect for Coptic Bound, Criss-Cross Coptic
and Pipe Organ Bindings.
Book
Boards - precut 9" x 6", perfect for Coptic Bound, Criss-Cross Coptic
and Pipe Organ Bindings.
Give yourself a break! $1.50 Cdn per pair
$1.00 USD
(there is an additional $0.50/pair charge for shipping this item)
To order any of the above items and the rubber stamps
go to:
Printable byhand
Products Order Form OR the PayPal
shopping cart.
|
If there is any information you would like to see in this newsletter,
let me know. Each month I will email you to let you know the new issue
is published. If you know someone who would like to receive notice of
byhand, just have them email me and I
will put them on the list. Bye for now and thanks for visiting! suzanne@quietfiredesign.com |
|
|
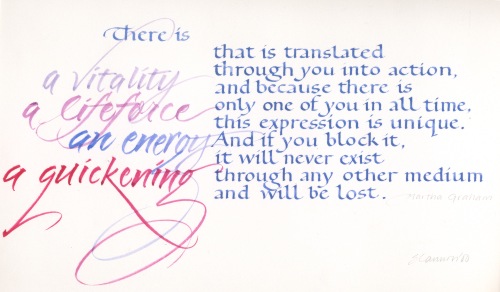
The original title lettering of byhand was done with a Mitchell's Roundhand Nib, size 0, and Higgins Eternal Ink. Quietfire Design Rubber stamps were used to create the other designs. |
| byhand Newsletter | Quietfire Design home page |
| Calligraphic Art | Handbound Books | Rubber Stamps | Ordering Information |
| Publications | Exhibitions | Calendar of Events | Classes | About Us |
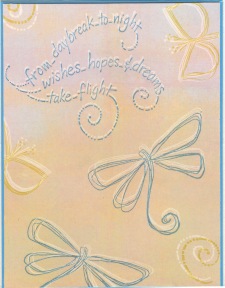


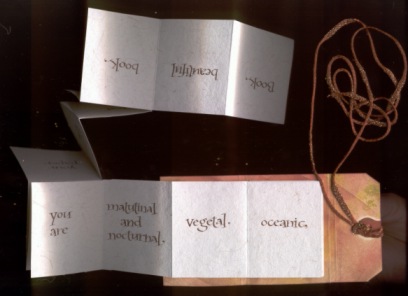
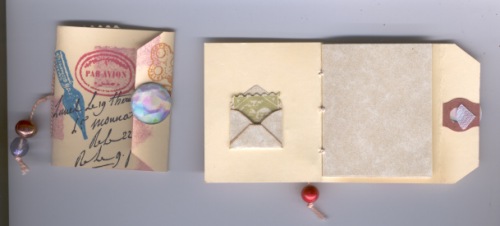
 Well,
you may have noticed that I borrowed a couple of ideas from your charmers
classes for my books. I had collected some quotes about women for another
project and since it seemed that all the participants were women (my apologies
if there were any men), I thought that they would be fun to include. While
at the scrap booking store looking for papers and stuff, I saw the stickers.
I love hydrangeas, so I couldn't resist. I also wanted something special
in the middle, so I thought of the flag book. When I did my prototype,
I realised it didn't have quite the same effect because it didn't open
the same way. But I decided to go with it anyway because I liked the contrasts
of color and texture. (Besides, you can always pop them out to get the
effect). I decided to also do the contrasting color along the edges to
tie it all together. And the suede paper for the cover seemed again like
a nice texture. I found the little flower buttons and figured they would
be a great way to close the cover. So that was how it all came about.
Another fun project.
Well,
you may have noticed that I borrowed a couple of ideas from your charmers
classes for my books. I had collected some quotes about women for another
project and since it seemed that all the participants were women (my apologies
if there were any men), I thought that they would be fun to include. While
at the scrap booking store looking for papers and stuff, I saw the stickers.
I love hydrangeas, so I couldn't resist. I also wanted something special
in the middle, so I thought of the flag book. When I did my prototype,
I realised it didn't have quite the same effect because it didn't open
the same way. But I decided to go with it anyway because I liked the contrasts
of color and texture. (Besides, you can always pop them out to get the
effect). I decided to also do the contrasting color along the edges to
tie it all together. And the suede paper for the cover seemed again like
a nice texture. I found the little flower buttons and figured they would
be a great way to close the cover. So that was how it all came about.
Another fun project. 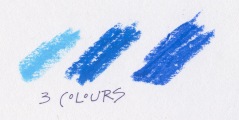 A
Bit about Oil Pastels
A
Bit about Oil Pastels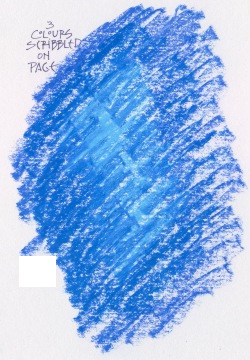


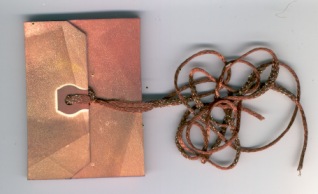
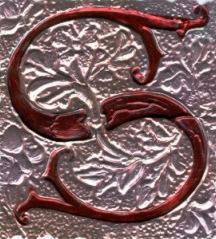 Lorna
Long of Kamloops, BC sent me this wonderful embossed S, a copy of one
she put on the front of a handbound book she make for another Suzanne.
Although the foil is not pure copper, it is an excellent example of embossing
with tooling metal. She has generously shared how she made it. Thanks
Lorna!
Lorna
Long of Kamloops, BC sent me this wonderful embossed S, a copy of one
she put on the front of a handbound book she make for another Suzanne.
Although the foil is not pure copper, it is an excellent example of embossing
with tooling metal. She has generously shared how she made it. Thanks
Lorna!