|
|
|
brought to you in living colour by Quietfire Design July/August 2003 - Issue 26 |
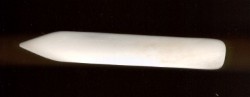
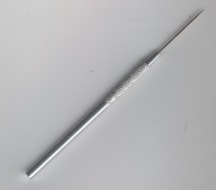
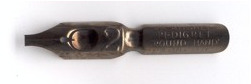 Mitchell Roundhand Nibs you can read more about these below |
Our new |
||
|
Welcome to the Summer issue of byhand! |
Important links at your fingertips!
How to subscribe to the byhand newsletter and other stuff! If you wish to contact me, my email address is: suzanne@quietfiredesign.com To subscribe: send me an email
saying 'subscribe'!
Come join us in our Yahoo discussion group, where we talk about artistic inspirations, make inquiries about techniques, and share quotes and resources.
http://groups.yahoo.com/group/byhandartists/
|
|
Books to Inspire
The
Decorated Page is a potpourri of methods for filling your journal
pages. The author discusses the types of paper found in journal and they
many types of journals available, as well as art supplies and how to use
them. There is a whole section on background techniques as well as lots
of ideas for layouts. Interspersed throughout the book are spreads about
historical decorated book and a section on altered books. Check it out!
|
|
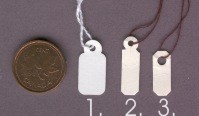
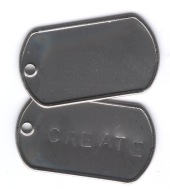
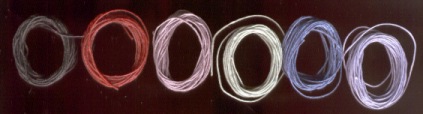
Summer Challenge! Many of you are familiar with the fabulously inspiring book True Colors (reviewed in the last issue of byhand). I thought we could have a True Colors mail in featuring - you guessed it - those small un-intimidating canvases - the shipping tag! Here's
what we'll do: Choose your colour from the list below, create a tag using
that colour scheme and mail in it. The tag may be any size. (You don't
need to have any knowledge of the book, it was just an springboard for
this idea) There will be a random draw from *each* of the colour categories
- so your chances of winning are excellent! If you've never tried this
before - give it a shot. Your
submission must be received on or before August 25, 2003. Send to Here are the list of colours! Have fun! |
||||||||||||
|
|
|
Coming Soon!
Artwerx is a 3-day potpourri of your favourite instructors
from all over! The event runs Just a reminder that Quietfire Design will be an Artwerx vendor and sponsor (which means, as a registrant of Artwerx, you will receive a little treat from Quietfire Design)! To celebrate, I thought we could have Meet at the Thirsty Turtle in the
Richmond Inn! Please email me if you'd like to come play to give me an idea how many are coming! (You're welcome to come even if you aren't attending Artwerx!) If you are in the lower mainland, I encourage you to come check out the Vendor market on the Friday, Aug.15 from 7 - 10 pm. Definitely a great place for retail therapy. Quietfire Design will have some Artwerx specials! See ya there! |
|
|
Suzanne's Schedule 2003 Some of these dates are tentative
- *Please do not try to register for fall classes
until they are announced by the host! tba
= to be announced
|
|||||||||||||||||||||||||||||||||||||||||||||||||||||||||||||||||||||
|
A closer look... |
|
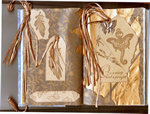
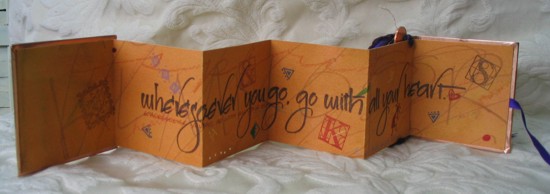
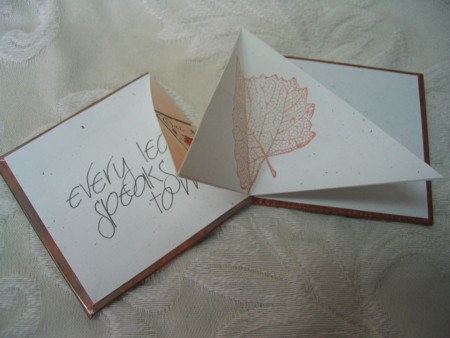
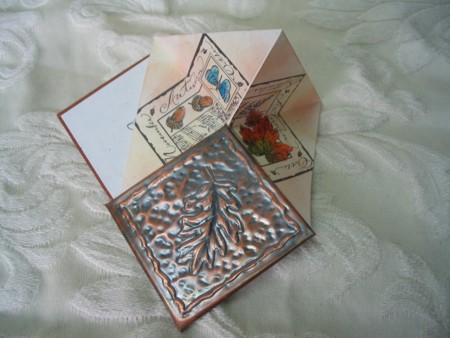
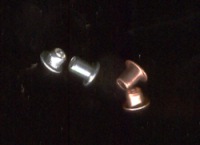
Copper Mini Book Swap In this swap, participants were to make small books, not larger than 3x3" and no thicker than 1/4" and use copper as some form of embellishment. Here are the first six books, in absolutely no order! . They are lovely and imaginative and so varied. Enjoy the results! |
|||||
|
The Players in this swap were:
|
|||||
|
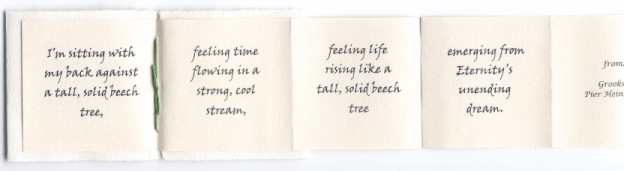
Kathy Mostardi The cover was done with watercolors on Arches Text Wove, with copper wire bent into a leaf shape, pounded flat and stitched into place with embroidery floss. The cover of the book folds in on itself to hide the stitching inside. The beech tree poem inside was printed on the computer in Viner's Font, then cut and folded into a pull-out accordion signature and stitched into the cover. |
|||||
|
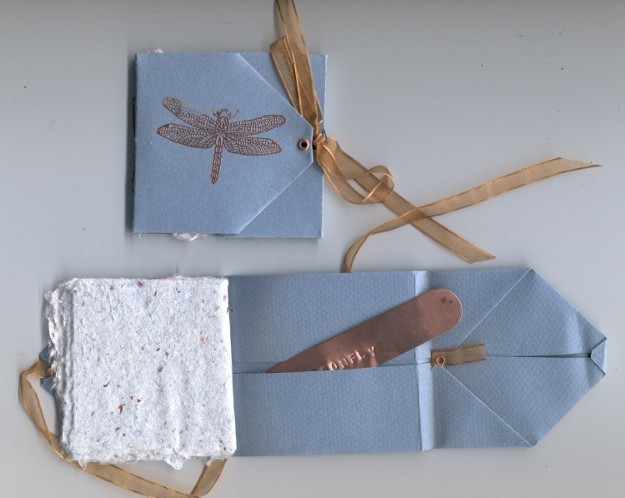
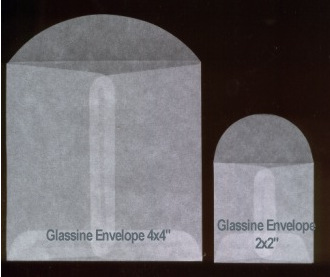
Barb Pankratz Barb designed her book after the Folded Envelope in Alisa Golden's Creating Handmade Books. She used Canson paper, made her own paper with copper leaf inclusions (very nice touch, Barb!), used copper eyelets, copper embossing on a copper tag, organdy ribbon and copper pamphlet binding. |
|||||
|
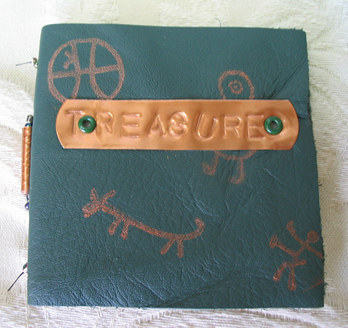
For the copper bead I used a stylus tool to carve the copper then I wrapped the copper around a skewer and the bead is ready. For the leather cover I used a piece of scrap leather cut to size and punched holes into the middle. The holes of the added paper should be at the same distance. Now you can start sewing the paper into the leather. I always stamp the leather with brilliance and I think I stamped this one also with brilliance, I don't have my extra book anymore, I wanted to make a friend happy, LOL, so I think I used copper color. And the stamps I used are from Stampinavia a Norwegian vendor. |
|||||
|
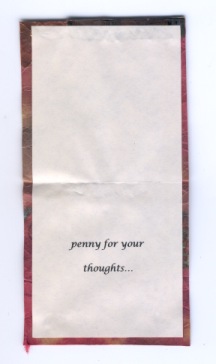
Shirl Van Eaton Mine are made from an industrial strength kraft paper I crushed before soaking with Procion Fabric Dyes. The cover features a copper corner punched from garden Slug Tape and a penny trapped under a piece of recycled car radiator copper. I burnished the penny through the copper to bring out the maple leaf. |
|||||
|
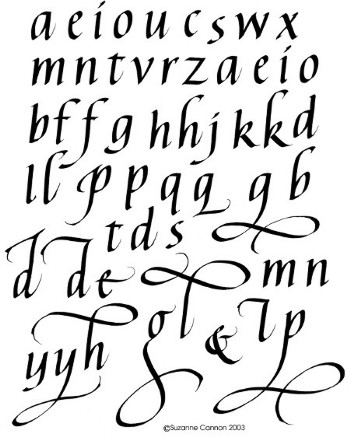
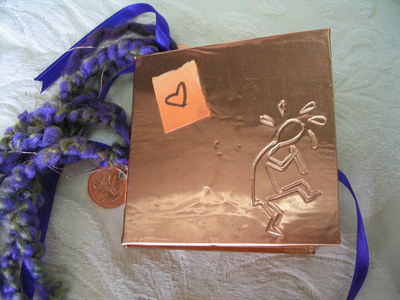
Sandy Sommerfeld I had known that I wanted my favourite Kokopeli used in the books somehow and it all started with the embossing the spirited flute player on the cover sheets of copper. Inside, I had used the cream colour based watercolour paper and added washes of burnt orange, sepia, and leaf green with Dr. Martin's. Also, while wet I had "scratched" in the alphabet and scribbles to add some texture. The quote came to me by way of my best bud Pam as well as her architectural stamps. I used crayons, prisma pencils, and mini rubber stamps to finish the background. The lettering is 'weaver writing' and I quite liked it for the openness and flow for the quote. Added the chunky yarn, the penny (it is hard to drill the older pennies BTW) and some copper cording. Tied into a 'standard' accordian folded book and there we go! |
|||||
|
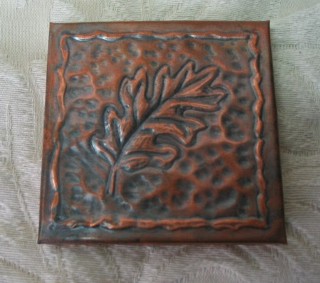
I dry embossed the leaf and border on the copper and added some "dents" to the background with the end of a paint brush handle. Then I spread liver of sulfur (directly from the bottle) on the copper using a cotton ball. It turns black immediately. I let it dry and then used steel wool to polish it. Some of the indented areas retain the shiny look but most of the surface becomes "aged". The inside is just rubber stamped and watercolored.
|
|||||
A Passion for Copper - Part VIIIParts I through VII are available in previous issues of byhand
Copper embroidery is a wonderful effect on textiles and simple to do. I set my sewing machine for free motion embroidery ( lower feed dogs) and use a size 80 or 100 embroidery needle and machine embroidery thread. I stitch slowly until the copper is attached, then nibble away until I reach the desired look that I want. I use a wide assortment of materials in my work such as cellophane,natural and man made fibres. Have fun..and remember there is no mistakes in art just creative solutions!! heather trepanier, port alberni bc
If
you have more questions, Heather would be happy to help you. She may be
contacted at: |
|
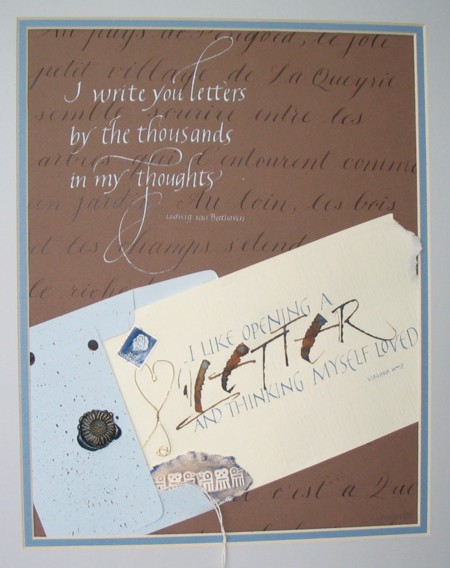
Gentle Thoughts
|
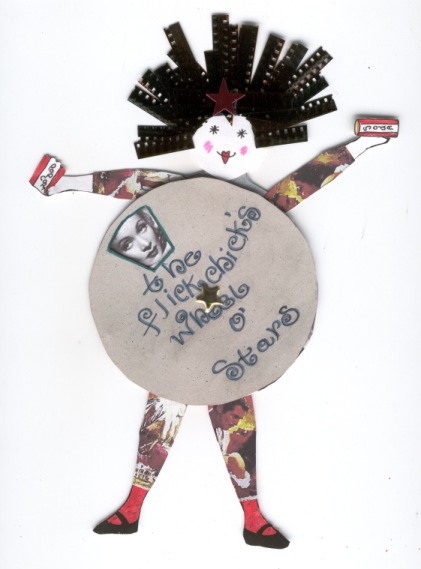
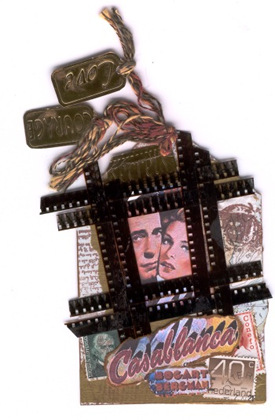
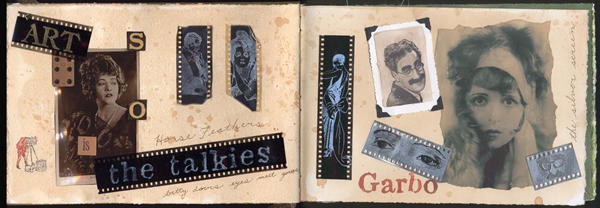
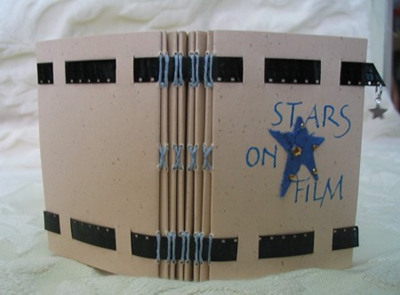
Stolen MomentsEllen, one of our active byhand members, came across some 8mm film recently, and challenged us to created something with it (she was generous enough to send us some to help us along!). Here are some of the results!
Ellen's Flick Chick - you can rotate the wheel to get the faces of different stars! Isn't she absolutely adorable? Check out her tights to see her favourite flick.
Ellen's flick tag
Patti's journal pages
Suzanne's wee book bound with the film.
|
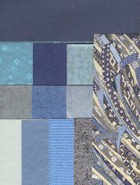
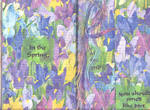
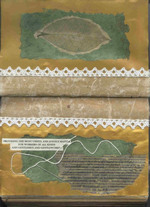
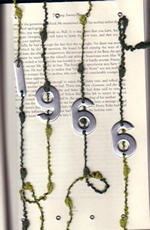
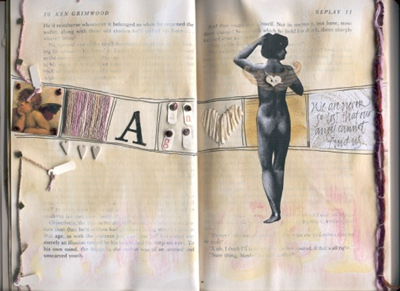
byhand Altered Book ProjectHere is a continuation of the Altered Book Project. If you want to see more images, go to the June 2003 issue of byhand. This month we present to you our fibre spreads. Each person used fibres to decorate their pages.
We hope you enjoy them! Please click here or on any of the images below to take you to the complete page of Fibre Spreads! |
|||
 |
 |
 |
 |
|
And some info arriving just before the byhand "presses" ran.....
|
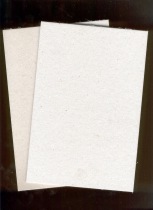
Below are just some of the byhand products! To check out the complete selection, click here!For your convenience,
you may visit the Waxed Linen Thread
4-ply Waxed Linen Thread Please see the byhand Products page for the complete list of colours! |
|||||||||||||||||
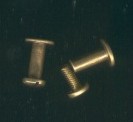
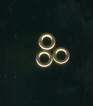
The eyelets! |
Subtle, but they make a statement! These are washers for your 1/8" eyelets. What will they think of next???100/package specify: brass
|
||||||||||||||||
|
|
|||||||||||||||||
|
They fit nicely on a bookboard of about 2.2mm thickness covered with decorative paper.
To order any of the above items and the rubber stamps
go to: |
|||||||||||||||||
|
If there is any information you would like to see in this newsletter,
let me know. Each month I will email you to let you know the new issue
is published. If you know someone who would like to receive notice of
byhand, just have them email me and I
will put them on the list. Bye for now and thanks for visiting! suzanne@quietfiredesign.com |
|
|
The original title lettering of byhand was done with a Mitchell's Roundhand Nib, size 0, and Higgins Eternal Ink. Quietfire Design Rubber stamps were used to create the other designs. |
| byhand Newsletter | Quietfire Design home page |
| Calligraphic Art | Handbound Books | Rubber Stamps | Ordering Information |
| Publications | Exhibitions | Calendar of Events | Classes | About Us |


 The
New Rubber!
The
New Rubber!


 The
reservoir for this nib is easily removable and adjustable which makes
the nib easy to clean and fine tune for use with the writing medium. This
reservoir is purchased separately and really isn't necessary for use with
the smaller nib sizes.
The
reservoir for this nib is easily removable and adjustable which makes
the nib easy to clean and fine tune for use with the writing medium. This
reservoir is purchased separately and really isn't necessary for use with
the smaller nib sizes. 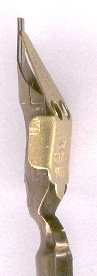 If
you can see light between the tines at any time, your nib is probably
not going to work! Sometimes beginners will neglect to clean their nibs
frequently and there will be a build up of ink between the tines. This
will force the tines apart and the ink will flood. I've had pearlescent
inks build up very quickly and ruin a nib. (That nib is now part of a
book cover!)
If
you can see light between the tines at any time, your nib is probably
not going to work! Sometimes beginners will neglect to clean their nibs
frequently and there will be a build up of ink between the tines. This
will force the tines apart and the ink will flood. I've had pearlescent
inks build up very quickly and ruin a nib. (That nib is now part of a
book cover!)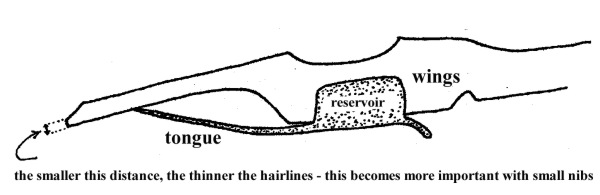

 Mieke Mulder
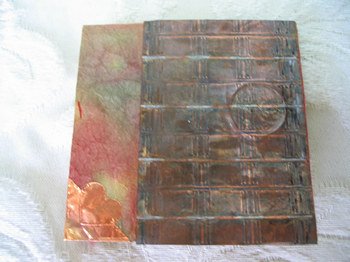
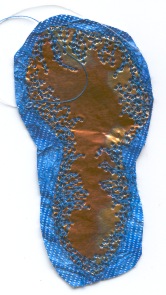 Recently,
here in Port Alberni, I've gotten to know fibre artist Heather Trepanier.
She was showing me some of her sample experiments and I jumped up and
down with excitement at seeing these. It is machine embroidery on copper!
Too cool!
Recently,
here in Port Alberni, I've gotten to know fibre artist Heather Trepanier.
She was showing me some of her sample experiments and I jumped up and
down with excitement at seeing these. It is machine embroidery on copper!
Too cool!
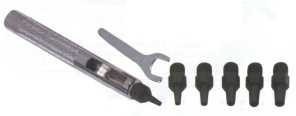 Anywhere
punch with 6 bits This wonderful punch has 6 different bits allowing
you to punch holes in the following sizes: 5/64, 3/32, 1/8, 9/64, 5/32
and 11/64 (or 2, 2.5, 3, 3.5, 4 and 5 mm)
Anywhere
punch with 6 bits This wonderful punch has 6 different bits allowing
you to punch holes in the following sizes: 5/64, 3/32, 1/8, 9/64, 5/32
and 11/64 (or 2, 2.5, 3, 3.5, 4 and 5 mm) 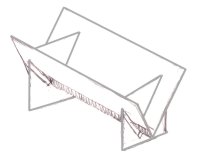
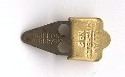
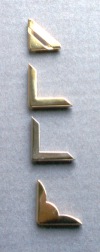 Book
Corners
Book
Corners