|
brought to you in
living colour by Quietfire Design
December 2004 - Issue 40
![]()
|
|
|
|
||||
|
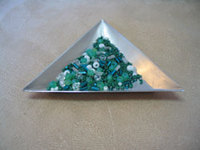
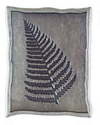
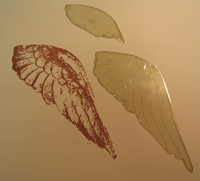
Mica Wings Perhaps it was the nature of the mineral that gave me the idea to do this.... Mica is formed in the earth in sheets and is translucent. The more layers, the darker it is. I thought it might be fun to try showing the different layers of wings by cutting mica into "wing" layers. Here is how I did it.... |
||||
|
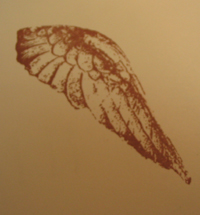
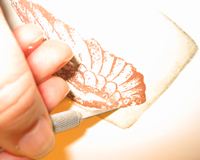
The first step was to stamp the wing on a piece of paper. This is Vickie Enkoff's rubber stamp #V153 wing. |
Next I chose a piece of mica that was large enough to cover the stamp. |
Mica is multilayered and the layers are easily separated. The idea with this project is to have additional layers show up darker, so you should remove about 3 layers to work on. |
||
|
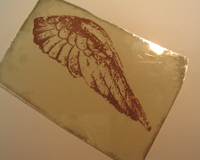
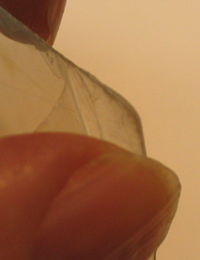
Holding the mica in place (and the camera!), I scratched outline of the wing in the mica.I also scratched the detail lines in the lower part of the wing.
|
I cut the wing out using scissors as it is much easier than using an exacto. |
I chose another smaller piece of mica for the next layer of the wing and again scratched the outline and the details using an exacto. |
||
|
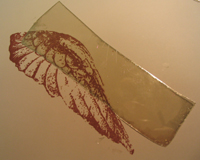
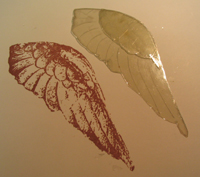
Here are the two pieces of mica and the original image. I used a very small bit of glue to hold the layers of mica together. Because the mica isn't porous, it takes forever for glue to dry between layers! |
Here are the layers together. Depending on the wing stamp decide to use, a third layer might also be interesting.
|
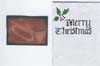
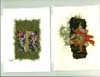
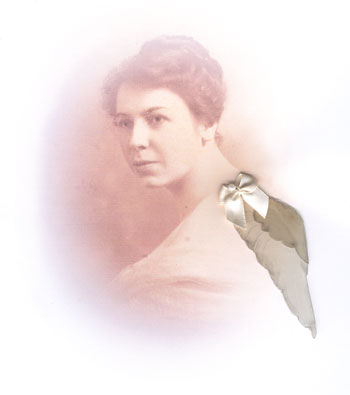
I added a bow to the top of the wing with a glue dot and then held the wing to the photo with another glue dot. I believe this woman is my grandmother's sister! (Have to check with Dad about that....) Create without Limits!
Mica is available for purchase on the OCS page. |
||
|
||||
|
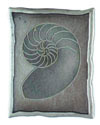
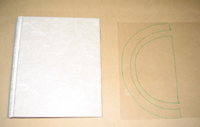
Draw your design out on a piece of acetate or a transparency. Cut out the transparency. |
Place the transparency under the unryu, preferably on a light table, or a white sheet of paper, so that you can see the shape of your pattern. |
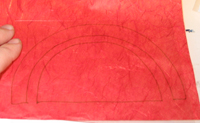
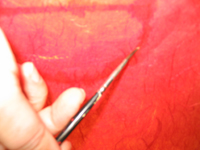
Use a pointed brush that holds a fair bit of water and draw the outline of your shape. Make sure you don't soak the whole area! |
||
|
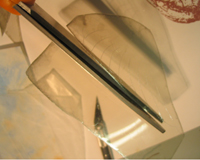
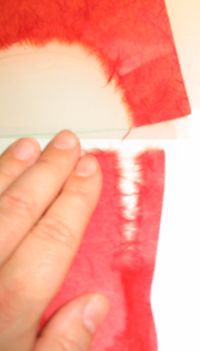
Place your hands on both sides of the wet line and pull gently. The paper will come apart leaving a lovely fibery edge. Different handmade papers will leave different edges. It's the long fibres in the paper that make this one special. |
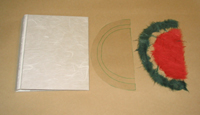
Wet and tear out all the pieces you need for your design and check they will fit where you want them. This watermelon just needed some seeds which I drew in with a felt marker.
This technique works well if you want a straight edge. Just line your ruler up and run your brush full of water along the edge of the ruler. Not enough water and the paper won't tear where you want it to and too much water will produce the same results! Practice makes perfect! |
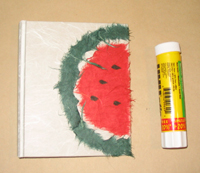
Glue the unryu pieces in place with a gluestick. Try not to get any of those fabulous fibres curled under (unless you want them that way!). Place a guard sheet over top of the glued down unryu and run a brayer over the top to insure a good bond.
Visit the Paper Joys Paper Sheets page to see the new Unryu Collage packages. |
||
|
||||
|
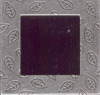
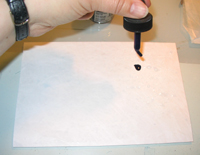
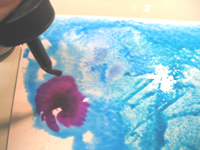
Make sure your Tyvek is laying on something that won't mind getting coloured! Slather the surface with clean water. Drop one drop of FW acrylic Ink on the surface of the paper. |
Spread it with a brush (not one of your good watercolour brushes! Don't forget this is acrylic!). |
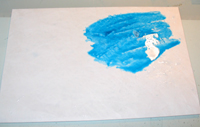
Add another colour of acrylic ink. I used Indigo blue, Prussian Blue and Purple Lake for this sheet. Spread the ink and mix it in some places with the other colour. |
||
|
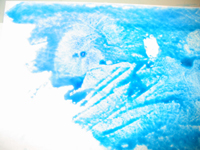
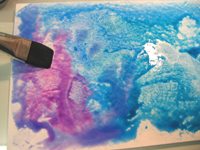
Repeat with the Violet ink - one drop is plenty of colour - this stuff is intense! |
Spread to your content! Try not to mix the colours completely, you want patches of true colour here and there. |
Just in case you believe Tyvek is waterproof - this is the surface of my glass covered drafting table after I remove the Tyvek sheet! Allow the sheet to dry. |
||
|
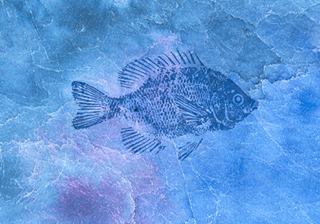
A warning about Tyvek.
I have used Tyvek to wrap the cover boards of books - if the book gets warm, the Tyvek will begin to melt and the cover will be ruined! |
I used Colorbox Crafters Ink to stamp the Fred Mullet fish. The colour was Midnight. Don't heat set or emboss the design!! The Tyvek will melt (which is another fun project itself!). The ink will take a while to dry.... Cut your artwork to size and use double sided tape to adhere it to a card! |
 |
||
|
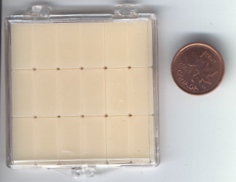
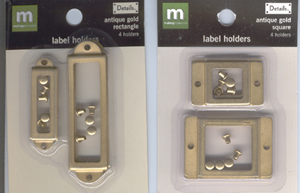
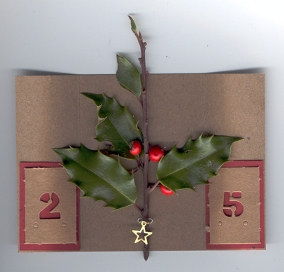
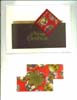
There is nothing quite as delightful as receiving a handmade card. Except maybe creating one! Here is an easy, clean design that can be made in minutes. All you need is a card, a slide mount, some decorative paper and an embellishment to put in the centre of the frame. |
||||
|
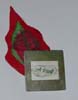
There are an amazing number of ways to decorate slide mounts. (You can see a wonderful collection of them created by Patti Sandham in the April 2004 issue of byhand - scroll to near the bottom.) A simple wrapping with decorative paper is fast and effective! |
||||
|
Mitre the corners like a good little bookbinder, as shown on the right, then cut an X from corner to corner inside the window of the slide mount. |
||||
|
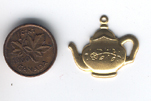
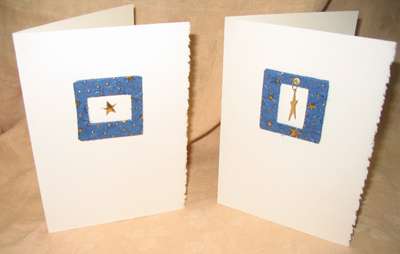
To adhere the slide mount to the front of the card I used double-sided tape. Once you have made a frame, it's a good idea to put something in it! On the card to the left, I used a puffy star adhered with a glue dot. The card on the right took a little more time, as I punched a hole, set an eyelet and used a jump ring to hang a stretched star inside the frame. The cards I used were 5x7" and I positioned the frame so the centre was 2 1/2" from the top edge of the card. Simply done - and delightfully handmade! |
||||
|
Stay tuned
for the Premium Subscriber January sale. In order to take advantage
of the sale prices you must be a 2005
Premium Subscriber! |
||
|
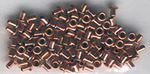
The Long Neck Eyelets and Washers are back in Stock!! If you've been visiting the byhand products pages recently, you may have to refresh your browser to see the new products.
|
||
|
Mini Eyelets Regular and Long |

|
|
|
|
||
|
This will be a 2-day workshop retreat to
do the Although all the logistics have not been worked out, I will start serious organizing after the holidays. This weekend will include And you'll be just over an hour away from the incredible Long Beach on the west coast of Vancouver Island. I am looking into accommodation options,
but the final choice and bookings will be up to each individual as will
the transportation costs to get to the workshop. For those who have already
signed up you'll hear from me very soon in the new year. I've had emails from Oregon, Edmonton,
Calgary, Winnipeg and of course, Vancouver Island!
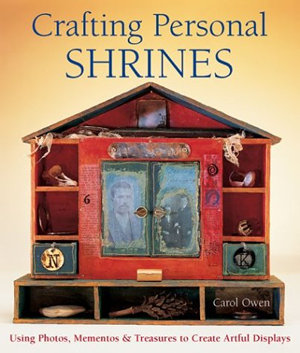
Books to Inspire
I was immediately drawn
to this book when I saw it! Link for Amazon.ca customers
Link for Amazon.com customers |
Important links at your fingertips!
Join
the supporters of byhand and become a
For more details, go to the If you wish to contact
me, my email address is: To
unsubscribe: send me an email saying 'unsubscribe'.
I'll live.... (sniff)
Please drop
into my other website: It changes every month!
While you nourish your
creative spirit by reading this newsletter, don't forget your creative
body needs nourishment inside and out! See
how I made out on the
5-Day High-Fibre Cleanse! |
2005
|
|||||||||||||||||||||||||||||||||||||
|
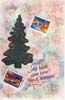
A few months ago, byhandartist Ellen Harper posted scans of a wonderful journal she had made. On each page of collages she had a single word which was the focus. I thought this was such a great idea that I challenged the byhandartists to make their own. Each week I assign a word and the artists create around that word. We've only just begun! The above artwork is a digital collage by Therese in Trenton. Nice, eh? Please come and join us! |
|
If there is any information you would like to see in this newsletter,
let me know. Each month I will email you to let you know the new issue
is published. If you know someone who would like to receive notice of
byhand, just have them email me and I
will put them on the list. Bye for now and thanks for visiting! suzanne@quietfiredesign.com |
|
|
The original title lettering of byhand was done with a Mitchell's Roundhand Nib, size 0, and Higgins Eternal Ink. Quietfire Design Rubber stamps were used to create the other designs. |
Artists whose work is shown in this newsletter retain the copyright on their own work.
| byhand Newsletter | Quietfire Design home page |
| Calligraphic Art | Handbound Books | byhandproducts | Ordering Information |
| Publications | Exhibitions | Classes | About Us |
© 2004 Suzanne Cannon
This newsletter is for the personal use of the subscriber and may not be reproduced
without written permission from Suzanne. You are welcome to email or print it
in it's entirety to share with friends, but ask that you include this copyright.
Thank you for your help and your understanding.


 Easy
Card design
Easy
Card design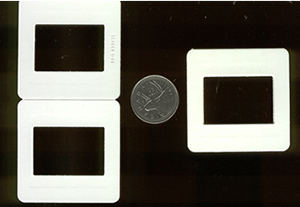 I
chose to use a slide mount to create a little frame and focal point of
the card. I could have cut the slide in half, but decided to make a deeper
frame and folded the frame and covered it with decorative paper.
I
chose to use a slide mount to create a little frame and focal point of
the card. I could have cut the slide in half, but decided to make a deeper
frame and folded the frame and covered it with decorative paper. Cut
a piece of decorative
Cut
a piece of decorative 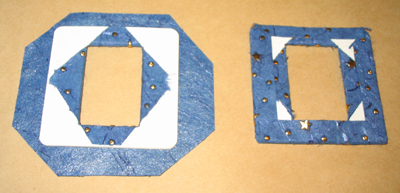 Fold
back the flaps you've created inside the window, then fold in the sides.
Fold
back the flaps you've created inside the window, then fold in the sides.